Homemade Chocolate with Raspberries

Homemade Chocolate with Raspberries

Ever since I saw a video of this simple recipe on my Instagram feed I couldn’t wait to try it.  But in the midst of holiday traditional baking and festivities I didn’t get to it until New Years Eve.  It comes together so quickly, literally, it takes 5 minutes to prepare and then sets in the freezer for an hour.  It is amazing, with just the right amount of sweetness from maple syrup, tartness from the raspberries wrapped in smooth, silky, rich chocolate that you have made yourself.

I have been experimenting with making chocolate for a while.  Various recipes using cocoa butter, coconut oil, honey, cocoa powder etc with varying results.  I like that this recipe includes some nut butter and nut milk and makes a soft chocolate that is a delicious fudge like dessert. A perfect sweet treat that is easy to vary based on seasonal fruit or what ever combination you like.

Although my family tells me they could eat this everyday, it is luxurious enough for special occasions.  When liquid it would pour nicely into molds, such as hearts for Valentine’s Day or other shapes for other special days. Packaged up in a special box, what a lovely gift it would be.

Homemade Chocolate with Raspberries

100 grams cocoa butter *

1/4 cup maple syrup

4 tablespoons cocoa powder

2 tablespoons cashew butter or other nut butter

1/4 cup coconut milk or almond milk

fresh raspberries

Prepare small cookie sheet or pan by lining with parchment paper.  In a small saucepan melt the cocoa butter with the maple syrup.  When melted whisk in cocoa powder until well blended.  Add nut butter and coconut milk and whisk until combined.  Pour onto parchment paper and spread out a little (I simply tilted the pan to spread evenly)  Sprinkle with fresh raspberries and freeze for one hour.  Cut into pieces and serve.  Store in the refrigerator.

*For those in the Metro Vancouver area, cocoa butter is available at Galloways.

This recipe is from feedfeed as part of Edible Holiday Gifts.

Dark Chocolate with Ginger, Cranberries and Hazelnuts

Dark Chocolates with Ginger, Cranberries and Hazelnuts

These are so easy to make and fun to assemble! They are just perfect for homemade treats to gift to family, friends, neighbours and teachers.  After making the first batch with my kids, they made them on thier own to sell in small packages at the school Christmas Craft Fair.  They were a huge hit and sold out so quickly we wish we had made more!

The variations in flavours are endless, although this combination tastes especially seasonal. Have fun experimenting and let me know what you come up with.

Chocolate is a treat but does provide nutritional benefits as well.  Dark chocolate contains flavonoids which are phytonutrients that have anti-inflammatory, anti-clotting, and antioxidant properties.  Dark chocolate varies in cocoa content and generally the higher the better, so aim for 70% or more.

 Dark Chocolate with Ginger, Cranberries and Hazelnuts

Fine quality extra dark chocolate (this one is 72%) cut into smallish squares or pieces
Hazelnuts, chopped
Candied ginger, very finely chopped
Sweetened dried cranberries, finely chopped
Fine sea salt

Heat oven to 150 degrees (on my oven, this is one of the keep warm settings). Anything over 100 will work as chocolate melts at about 90 degrees.  Put a silicone mat on a cookie tray or pan and arrange chocolate leaving about 1 inch space between each piece.  Depending on the size of the chocolate and your oven temperature it will melt quickly (mine took about 5 minutes).  Remove from oven once chocolate is melted.  Sprinkle chocolate with hazelnuts, ginger and cranberries and top with a few grains of salt.  Cool until set and chocolate is hardened, generally a couple of hours, however the freezer works in case of emergencies. Gently lift from silicone mat (you may need to lift mat up and peel them off).

Dark Chocolate Peanut Butter Brownies (with black beans)

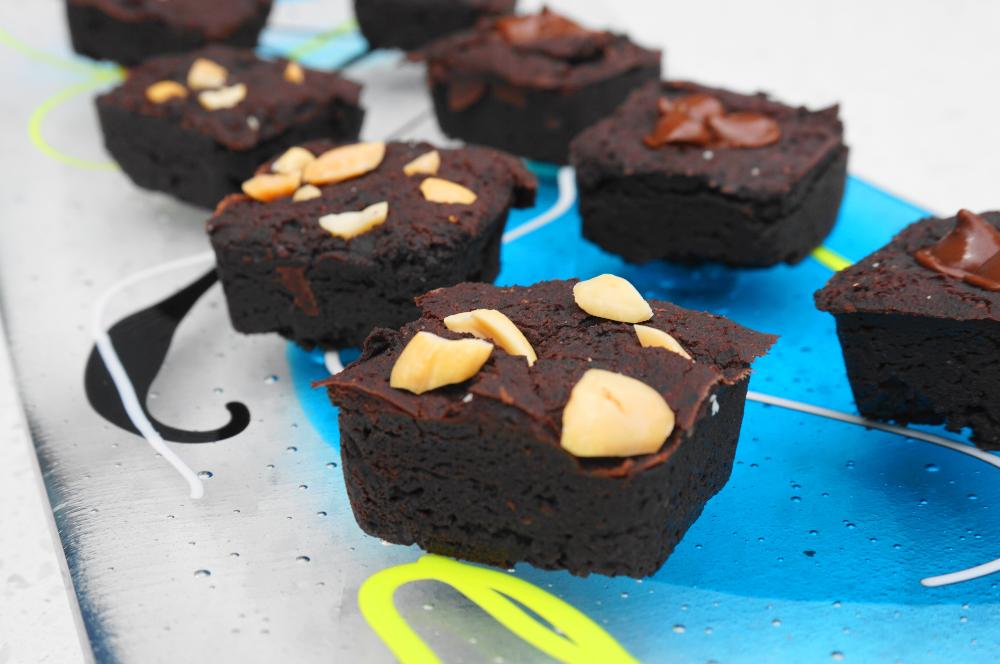
Dark Chocolate Peanut Butter Brownies displayed on a plate
Dark Chocolate Peanut Butter Brownies

Filled with protein, fibre, low in sugar, no added oil or fat, high in antioxidants and incredibly delicious? You will never believe the main ingredient in these dark chocolate peanut butter morsels is…..BLACK BEANS! I was skeptical too when I read about black bean brownies on various blogs, but honestly if you haven’t tried them yet, you will be amazed at just how good they are.  I have a lot of combinations, coffee, chili powder, candied ginger, but the family favourite is this recipe with peanut butter.    

Simple and quick, these come together in about 10 minutes (with the help of the food processor) and they bake quickly too, especially these small size square ones. This dessert or treat is truly guilt free!

Dark Chocolate Peanut Butter Brownies (with Black Beans)

Makes 24 squares

1 can or 1 3/4 cup cooked black beans (if using canned beans, rinse well and drain them well)

2/3 cup cocoa

1 tsp vanilla extract

1/4 teaspoon salt

1 1/2 teaspoon baking powder

1/2 cup sugar

2 tablespoons milled flax

1/4 cup water

1/4 cup natural peanut butter (Natural peanut butter contains only peanuts and salt)

few tablespoons of chopped peanuts

Directions:  Heat oven to 350 degrees.  Mix flax with water and set aside while you put everything else in the bowl of the food processor, and then add the flax and water mixture.  Blend well until beans are pureed and everything is well incorporated.  It will look like hummus with an easy spreading consistency.  Add a little water or milk to thin if necessary. Scoop into prepared pan and top with chopped peanuts or chocolate chips if desired.  I used a silicone baking sheet with squares so no greasing was necessary.  If using a conventional muffin tin, line with parchment cups or grease well.  Bake at 350 degrees for 10- 25 minutes.  My silicone baking squares made 24 and took just over 10 minutes but a conventional muffin pan would make 12 brownies and take about 20-25 minutes.  They are done when the look dry on top and they have moved a little away from the edges of the pan.  They should be moist in the middle. Let cool in pan before removing gently.  Best enjoyed the day they are made.

The inspiration for this recipe came from many blogs, especially Minimalist Baker and My Little Celebration.