Vegetable Stir Fry with Cashews

Vegetable Stir Fry with Cashews - a simple super healthy meal with broccoli, peppers, carrots, mushrooms, cashews and rice or noodles
Vegetable Stir Fry with Cashews

I love the colours in stir fry dishes.  This is one recipe where the vegetables are the stars of the plate.  Crisp, vibrant colours of red, green, orange, yellow; they are a feast for our eyes and taste amazing! They are incredibly versatile and easy to change up based on what is in season, on sale or what ever strikes you to add.  There are never any left overs and everyone has a satisfying meal made up of more than half a plate of vegetables and protein rich cashews, completed with rice, barley, noodles, or alternative.

Vegetables cup up for stir fry

There is a knack to making stir fries and it is all in the prep. Wash and chop all the ingredients and have everything ready right beside your wok.  Have your sauce mixture ready to go in and start heating up the pan.  Once the cooking begins, dinner will be on the table in less than 10 minutes.

Stainless Steel Wok with stir fry carrots

I love my heavy stainless steel wok.  It heats so well and so evenly.  I recommend stainless steel or cast iron pans.  It was an investment many years ago and was money well spent.  Many woks are not suitable for high heat cooking and are coated with a non stick coating which can have health risks. For more information on non stick cookware see the guidelines from Cancer.ca

Vegetable Stir Fry with Cashews (Serves 4)

4 cups broccoli florets

4 carrots chopped

1 red pepper chopped (or mix of colours to make approx 1 pepper)

10 mushrooms

1 tablespoon coconut oil

1 tablespoon grated ginger

3 cloves garlic

1/2 cup vegetable stock

2 tsp corn starch

3 tablespoons low sodium soy sauce

1 tsp rice vinegar

2 pinches red pepper flakes

1/2 cup roasted cashews

Rice, barley, quinoa or noodles of choice

Directions:  In a small bowl stir together vegetable stock, corn starch, soy sauce, rice vinegar, and red pepper flakes.  Set aside while you wash and chop all the vegetables.  Heat coconut oil in wok over medium high heat and add garlic and ginger.  Cook until fragrant.  In order add carrots, mushrooms, broccoli, peppers and cook, stirring the vegetables gently so that they cook quickly, remaining firm and with bright colours.  Add stock mixture which will thicken, glaze and coat the vegetables. Top with cashews.  Serve with rice, barley, quinoa or noodles of choice.

This recipe is adapted from Whole Foods Recipes.

Pear Cardamom Granola with Pecans

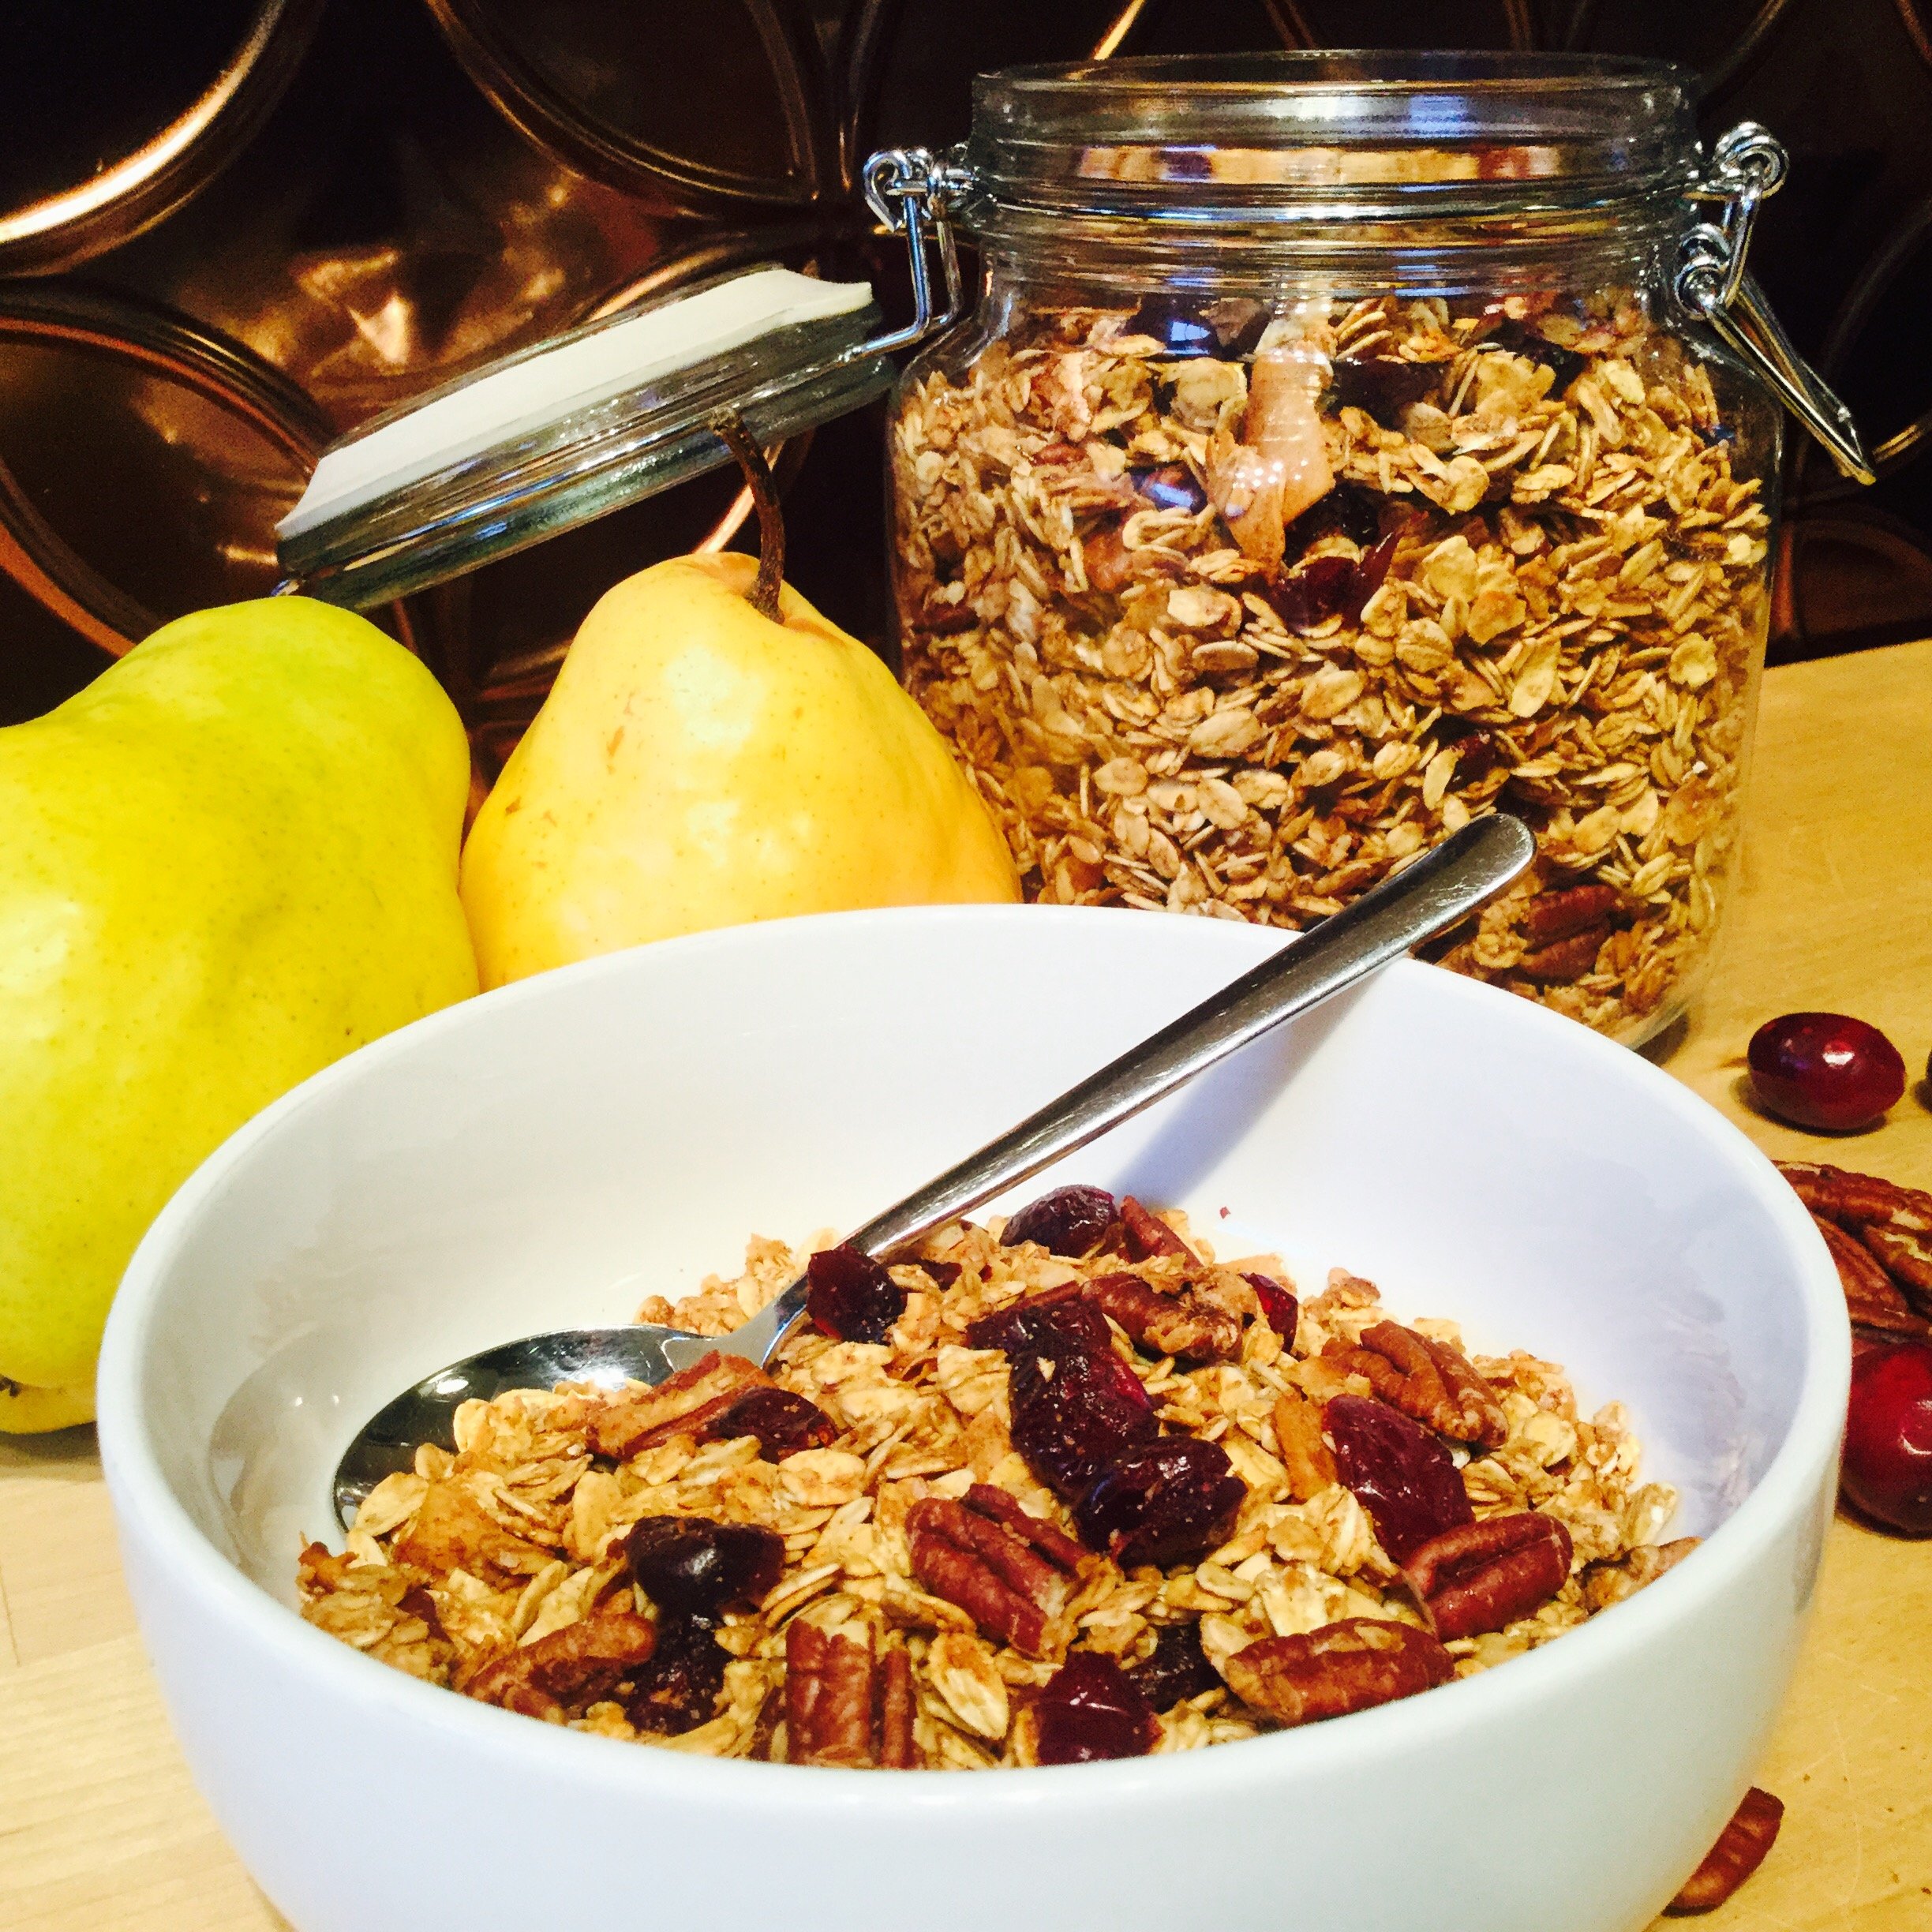
Bowl of granola with pears, pecans and cranberries, large container of granola in background
Pear Cardamom Granola with Pecans

There is something about cardamom that is hard to describe.  At first it is a spicy peppery taste that makes me think of savoury dishes, but then there is a hint of sweet and a nut taste too.  It is a unique powerful spice that is very aromatic.  I love it.  I keep finding more and more ways to use it.  Cardamom is delicious in coffee, hot chocolate, warm milk or of course chai tea.  It is wonderful in combination with apples, pears and oranges and it goes very well with ginger and cinnamon.  Much more commonly used outside of North America in India, Asia, Sweden and Finland, it isn’t a spice I know very well, but I am looking forward to trying more recipes with cardamom as it makes dishes extra special.

This granola is extra special.  Spicy, sweet, crunchy, nutty; it is one terrific bowl of cereal that is hearty and satisfying.  Perfect for busy mornings, it provides a nutritious breakfast that is completely delicious.  Filled with toasty oats, coconut, pecans, just enough sweetness and lovely warm spice from cardamom, cinnamon and ginger it is great for cold winter mornings. I usually make a batch on the weekend to last for a couple of breakfasts throughout the next week or so.

Speaking of batch cooking and planning ahead, that is my January project. There is something about the New Year that makes me want to get organized.  Determined to do meal plans, cook ahead, and organize the kitchen it helps us to save money and time, reduce our food waste, plan to include lots of colours and increase variety in our diets. Make ahead breakfasts, crock pot dinners, batch cooking – it all just helps so much to reduce stress and provide healthy food for our busy family even on the most hectic of days.

Pear Cardamom Granola with Pecans 

Makes 12 servings (1/2 cup)

4 cups oats (Large Flake or Old Fashioned Oats) *

1/2 cup coconut

1/2 cup pecans

1 cup pear sauce (or apple sauce)*

2 tablespoons oil

1/3 cup brown sugar*

1 tsp ground cardamom

3/4 tsp ground cinnamon

3/4 tsp ground ginger

1/2 tsp salt

1/2 cup dried cranberries

Directions: Preheat oven to 300 degrees and prepare cooking pans by lining them with parchment paper.  In a large bowl, mix together oats, coconut and pecans and set aside.  In a small saucepan mix together pear sauce, oil, brown sugar, spices and salt.  Heat over low heat until sugar is dissolved.  Pour sauce mixture into oats and stir well.  Spread out onto prepared pans.  Bake for approx 45 minutes until toasty.  Stir every 15 minutes and add the dried cranberries during the last 10 minutes of baking.  Let cool completely and store in a jar. Makes approx 6 cups granola.

*To make gluten free ensure gluten free oats are used.

*To make pear sauce, wash pears, core and chop.  Add to small saucepan with a little water and cook on low until tender.  Mash or blend.

*Substitute 1/4 cup honey or 1/4 cup maple syrup if desired.


Buckwheat Pilaf (dressing or stuffing)

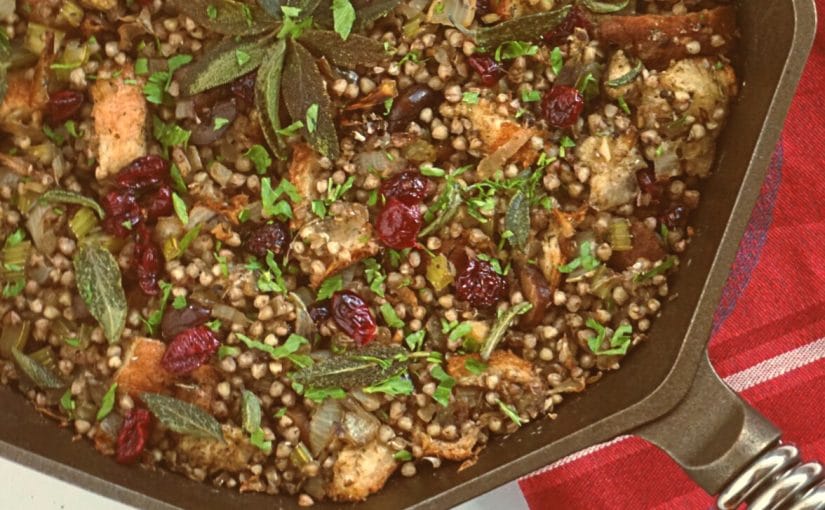
Whether you call it dressing, stuffing or simply a pilaf, this buckwheat dish is a wonderful addition to a special occasion dinner or any meal where you would typically have a grain based dish. It is vegan and gluten free. It can be made a day or two ahead, kept refrigerated and heated when needed.

Buckwheat is not a “wheat” at all or even a grain.  It is a fruit seed related to rhubarb and sorrel.  It is an excellent choice for a naturally gluten free dish and a terrific alternative to rice or other grains.  Buckwheat is very nutritious and has been shown to be beneficial in heart health and also in controlling blood glucose, making it a good choice for diabetes, pre diabetes and for everyone as part of a healthy diet. It is a good source of fiber and is a plant based source of high quality protein.

My Mom introduced us to buckwheat which she used in Poland where it is much more common than in North America.  To this day, Thanksgiving or Christmas dinner doesn’t seem the same to me without her delicious buckwheat stuffing!
Buckwheat Dressing
Buckwheat Dressing
If you have left over bread it is easy to adjust this recipe to include it and perhaps makes it a true dressing.  Simply cut stale or dry bread into small cubes, add it to the dressing, adding an addition 1/2 cup of mushroom broth. Depending on how much bread you are adding you may want to add additional herbs.  Press into pan and bake for 30 minutes at 350 degrees.

Buckwheat Dressing or Stuffing

Course Side Dish
Cuisine Gluten Free, Holiday, Vegan
Prep Time 20 minutes
Cook Time 20 minutes
Total Time 40 minutes
Servings 8

Ingredients

  • 1 Cup Buckwheat
  • 2 Cups Mushroom Broth
  • 1 Tbsp Olive oil
  • 1 Medium Onion, finely diced
  • 2 Ribs Celery, finely diced About 1 cup
  • 1 Clove Garlic, minced
  • 100 Grams Chestnuts, chopped
  • 1 Tsp Sage, dried
  • 1/2 Tsp Thyme, dried
  • 1/2 Tsp Marjoram, dried
  • 1/4 Tsp Salt Or more to taste
  • 1/8 Tsp Pepper Or more to taste
  • Fresh sage leaves For garnish
  • 1 Tsp Olive oil To fry sage leaves

Variation: Adding Bread

  • 1/2 Loaf Bread, 2-3 days old Gluten free if preferred
  • 1/2 Cup Mushroom broth

Instructions

  1. Pick over buckwheat and remove any small stones.  Rinse and drain.  Add mushroom broth and buckwheat to a medium saucepan and cook on medium until most of the water is absorbed.  Turn off heat, cover and let sit covered until all the water is absorbed, about 20 minutes.  

    While buckwheat is cooking, heat olive oil in a medium saucepan.  Add onion, celery and garlic.  Cook a few minutes until vegetables are soft and getting some colour.  Add spices, chopped chestnuts, cooked buckwheat and dried cranberries.  Taste for seasoning and add more salt and pepper if needed.  

    Heat 1 tsp oil in small pan and quickly fry sage leaves.  Sprinkle on top.  

Variation: Adding Bread

  1. Preheat oven  to 350 degrees.  Cut bread into small cubes and add into mixture.  Pour extra broth in and mix well. Press into oven proof casserole dish or pan.  Bake for 30 minutes. 

Sorrel Pesto

Sorrel
Sorrel Pesto

Sorrel is a beautiful plant that is incredibly easy to grow. There is the broad leaf variety pictured above and also a lovely red veined variety that is so pretty with the red throughout.   It is a perennial green that produces early in spring and late into the fall.  It is a lovely plant to grow in your garden and is a super healthy green that is popping up at more and more farmers market stands.  It produces masses of edible green leaves filled with Vitamin A, Vitamin C and potassium.  In the spring time, it adds a pop of colour and bright taste to an early green salad and later in the year it works well added to other greens in recipes or in making a sauce (it is kind of like the squeeze of lemon juice).  The leaves have a tangy lemony taste that is a little sour and bitter.  Some describe it as a sour apple candy taste.  I love having it in my garden and have enjoyed finding interesting ways to use it.

This quick and easy pesto is made with sorrel, garlic, sunflower seeds, salt, and olive oil.  This fresh light lemony tasting pesto adds a boost of flavour to roasted potatoes, gnocchi, pasta, soup, and sauces.  It also makes a wonderful and healthy alternative to butter or mayo on avocado tomato toast or sandwiches.


Sorrel Pesto

20 sorrel leaves

2 cloves garlic

1/4 cup extra virgin olive oil

salt

1/2 cup sunflower seeds

1/2 cup fresh grated Parmesan cheese

Add sorrel, garlic and sunflower seeds to food processor and process until leaves and seeds are ground up.  Add parmesan cheese,  salt and olive oil.  Taste to adjust seasonings, adding salt, olive oil as needed to desired consistency. This pesto will keep well refrigerated or can be frozen for later use.

Creamy Carrot Soup with Coconut Milk

Bowl of Creamy Carrot Soup pictured with crackers
Creamy Carrot Soup with Coconut Milk

This creamy carrot soup is so perfect for these cooler fall days when you want something comforting yet nourishing.  Made with rice to thicken and is creamy and delicious with the added coconut milk.  Simple yet elegant it is complimented perfectly by any variation of fresh herbs.  


Creamy Carrot Soup (with coconut milk)

1 tablespoon coconut oil

1 tablespoon olive oil

1 large onion

2 garlic cloves

4-5 small fresh thyme sprigs 

4 cups chopped carrots

6 tbsp white rice

4 cups vegetable stock

1 1/2 cup coconut milk (unsweetened)

salt and pepper 

Garnish with coconut butter and finely chopped fresh herbs.


Directions:  

Melt coconut oil and heat along with olive oil in large saucepan, over medium heat.  Add onion and garlic and cook until translucent and slightly browned.  Add thyme, carrots, vegetable stock and rice.  Bring to boil and then simmer until vegetables are very soft and rice is well cooked, about 1 hour.  Cool slightly, then puree.  Return to saucepan and add coconut milk, adding extra coconut milk or water to desired consistency. Season with salt and pepper to taste . 


Molasses Butter with Corn on the Cob

image

Molasses Butter with Corn on the Cob

This recipe is incredibly easy and incredibly delicious.  It is definitely one of those “Why didn’t I try this sooner?” kind of recipes.  I first got the idea from my sister, who got it from her friend.  I went on line to credit the source because I know it wasn’t original but could only find recipes that used only a little molasses. Trust me, it needs a healthy dose of deliciously rich molasses flavour!

Molasses Butter

4 tablespoons unsalted butter, at room temperature

2 tablespoons Crosby’s Fancy Molasses

pinch sea salt

Directions:

Using the back of a spoon, spread the butter in a small bowl.  Slowly add the molasses incorporating it into the butter as you go until it is smooth.  Add salt to taste.  Refridgerate and it will firm up.  Remove approx 15 min before serving.  *Don’t be tempted to melt the butter, it won’t turn out the same. You can adjust the quantity to any you want but keep the proportion the same – 2 parts butter to 1 part molasses.

This butter is highly addictive and you will find yourself searching for other things to put it on….to keep you from eating it straight from the container! It is wonderful on corn on the cob, popcorn, cornbread, sweet potatoes,  winter squash, carrots, root vegetables, toast, etc. Good thing a little packs a lot of flavour and goes a long way.

Artisan Bread meets Craft Beer

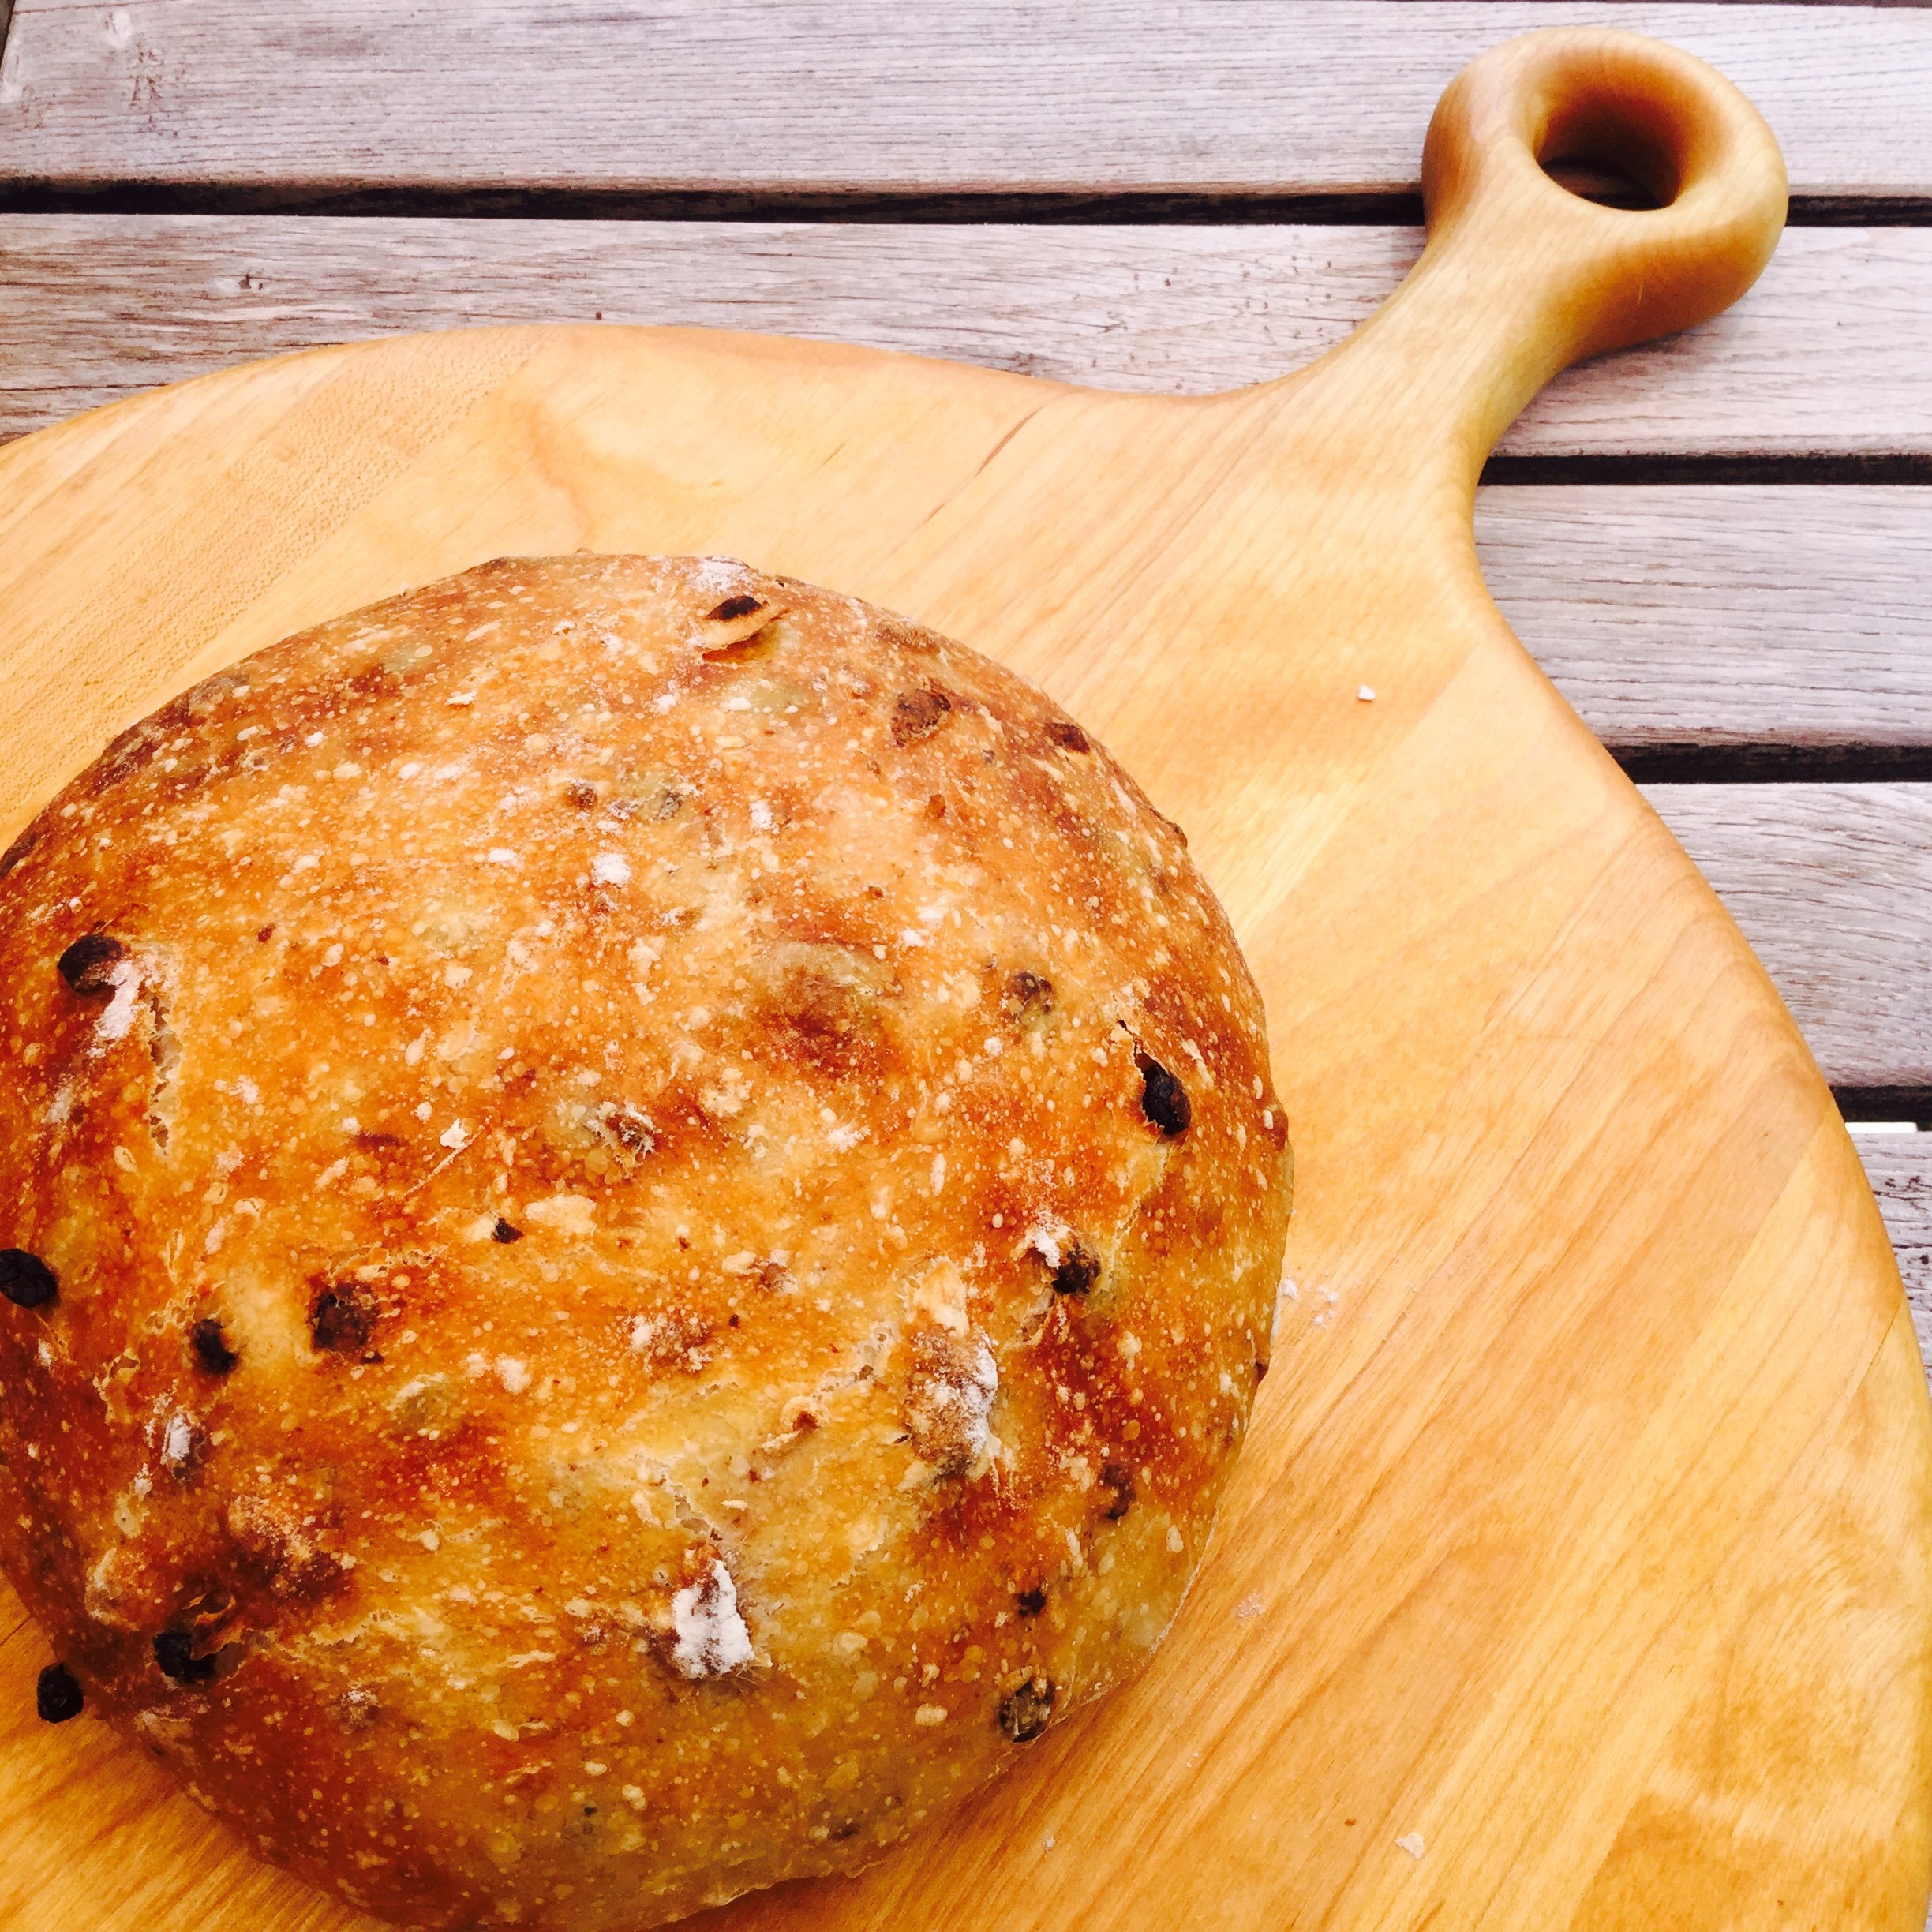
Beautiful Artisan Easy Sour Dough Bread pictured on a gorgeous cutting board
Artisan Bread with Craft Beer

If you have not heard about this incredibly easy recipe for Artisan Bread, here it is.  It is one of the most popular recipes that was EVER published by the New York Times, The No Knead Bread. Thank you, Jim Lahey, this bread has improved our lives! So easy, my kids can both make it and I have made it many times, with many variations trying to add whole grains and healthy things into it, sometimes with epic fails. This time I tried it using beer to replace the water.

Beers adds something extraordinary to bread. Using a local craft beer instead of the water and the addition of currants and pecans results in a completely delicious gift worthy loaf.   We have also tried it with hazelnuts, dried cherries and dark chocolate with a dark beer and it is awesome*! (It went so fast I couldn’t take a picture of it.)  Beer adds terrific flavour to breads and with so many different styles and flavours in beer, there is an endless variety of options to experiment with.  A dark porter or stout beer will yield a darker bread with more pronounced flavours.  The bread will have all the flavours in the beer but will be much less intense.  As tempting as it will be to save the whole loaf for the adults, the alcohol from the beer burns off during the cooking so bread made with beer does not contain alcohol.

One thing that is tricky about making bread is it can be difficult to tell when it is done.  It is not like other baked goods where a finger press, slight nudge or toothpick gives us the information we need. A fool proof way to measure for the perfect loaf is to measure the internal temperature.  I have started using my kitchen thermometer to test bread and even other baked goods when I’m just not sure.   It turns out that I was slightly under cooking bread which explains why is was sometimes doughy inside.  Using an instant read thermometer, stick it inside the middle of the loaf.  You are looking for 190 degrees for a basic bread and 200 degrees for a bread with butter, milk or eggs.


Artisan Bread with Craft Beer (studded with pecans and currants)

Makes 1 loaf

1 1/2 cup beer (I used a lager)

3 cups all purpose flour

1/4 cup currants

1/2 cup chopped roasted pecans

1/2 tsp yeast

1 tsp salt

Directions:  Mix everything together ( I used a stand mixer with dough hook but you can easily do this with a bowl and spoon).  Cover and let rest over night or at least 12 hours. Sprinkle parchment paper with flour, bran or cornmeal and turn bowl upside down so that the dough will drop onto the parchment paper.  Sprinkle with flour and gently fold dough over a few times to form a ball.  Cover and let rest another 1-2 hours.  Heat oven with dutch oven inside to 450 degrees.  When hot, put dough (still on parchment paper) inside dutch oven, cover and bake 30 minutes.  Remove lid and bake another 10 minutes or so until crust is golden brown. Test with thermometer to be sure the bread is cooked in the middle.  Your house will smell amazing and it will look incredible but try your best to wait at least 10 minutes before cutting.

*use a porter or stout beer, add 1/4 cup chopped dark chocolate, 1/4 cup chopped dried cherries, and 1/4 cup chopped roasted hazelnuts

Have you tried the No Knead Bread recipe and what are your variations?

Dark Chocolate Peanut Butter Brownies (with black beans)

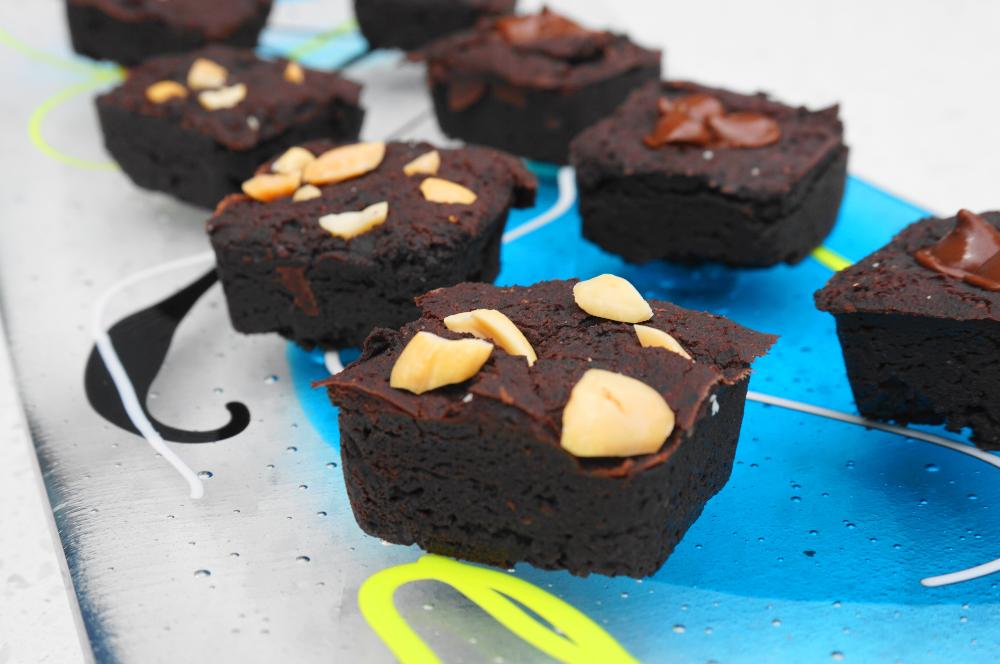
Dark Chocolate Peanut Butter Brownies displayed on a plate
Dark Chocolate Peanut Butter Brownies

Filled with protein, fibre, low in sugar, no added oil or fat, high in antioxidants and incredibly delicious? You will never believe the main ingredient in these dark chocolate peanut butter morsels is…..BLACK BEANS! I was skeptical too when I read about black bean brownies on various blogs, but honestly if you haven’t tried them yet, you will be amazed at just how good they are.  I have a lot of combinations, coffee, chili powder, candied ginger, but the family favourite is this recipe with peanut butter.    

Simple and quick, these come together in about 10 minutes (with the help of the food processor) and they bake quickly too, especially these small size square ones. This dessert or treat is truly guilt free!

Dark Chocolate Peanut Butter Brownies (with Black Beans)

Makes 24 squares

1 can or 1 3/4 cup cooked black beans (if using canned beans, rinse well and drain them well)

2/3 cup cocoa

1 tsp vanilla extract

1/4 teaspoon salt

1 1/2 teaspoon baking powder

1/2 cup sugar

2 tablespoons milled flax

1/4 cup water

1/4 cup natural peanut butter (Natural peanut butter contains only peanuts and salt)

few tablespoons of chopped peanuts

Directions:  Heat oven to 350 degrees.  Mix flax with water and set aside while you put everything else in the bowl of the food processor, and then add the flax and water mixture.  Blend well until beans are pureed and everything is well incorporated.  It will look like hummus with an easy spreading consistency.  Add a little water or milk to thin if necessary. Scoop into prepared pan and top with chopped peanuts or chocolate chips if desired.  I used a silicone baking sheet with squares so no greasing was necessary.  If using a conventional muffin tin, line with parchment cups or grease well.  Bake at 350 degrees for 10- 25 minutes.  My silicone baking squares made 24 and took just over 10 minutes but a conventional muffin pan would make 12 brownies and take about 20-25 minutes.  They are done when the look dry on top and they have moved a little away from the edges of the pan.  They should be moist in the middle. Let cool in pan before removing gently.  Best enjoyed the day they are made.

The inspiration for this recipe came from many blogs, especially Minimalist Baker and My Little Celebration.


Lemon Balm Pesto

image

Lemon Balm Pesto

Lemon Balm is a perennial herb from the mint family.  It grows very quickly and is quite a beautiful plant.  It has a refreshing light lemon aroma and flavour and many believe it aids digestion, and has a calming affect. It attracts bees, butterflies and birds and is a lovely addition to any garden.  

It is probably most commonly used in tea or ice tea but it really can be used anywhere in cooking where you want a light lemon flavour.  Mixed with butter it is wonderful to add to potatoes, asapargus, or any spring vegetable.  

Lemon Balm can be used in many ways and here I have combined it with green garlic (the tender young shoots from planted garlic cloves), pine nuts, olive oil, and salt for a delicious light lemony pesto. (Please note that you can use garlic chives or garlic cloves to substitute for the green garlic.  The green garlic or chives give a lighter garlic flavour whereas the cloves would be a stronger garlic flavour.) This pesto is incredible mixed with goat cheese or yogurt cheese, tossed with potatoes, pasta, rubbed onto salmon, chicken, or anywhere you would use pesto. 

Lemon Balm Pesto

1 cup lemon balm leaves
1/4 chopped green garlic
1/4 cup pine nuts, lightly toasted
2 tbsp olive oil
1/8 tsp salt
Put everthing into small bowl of food processor and process until smooth.